
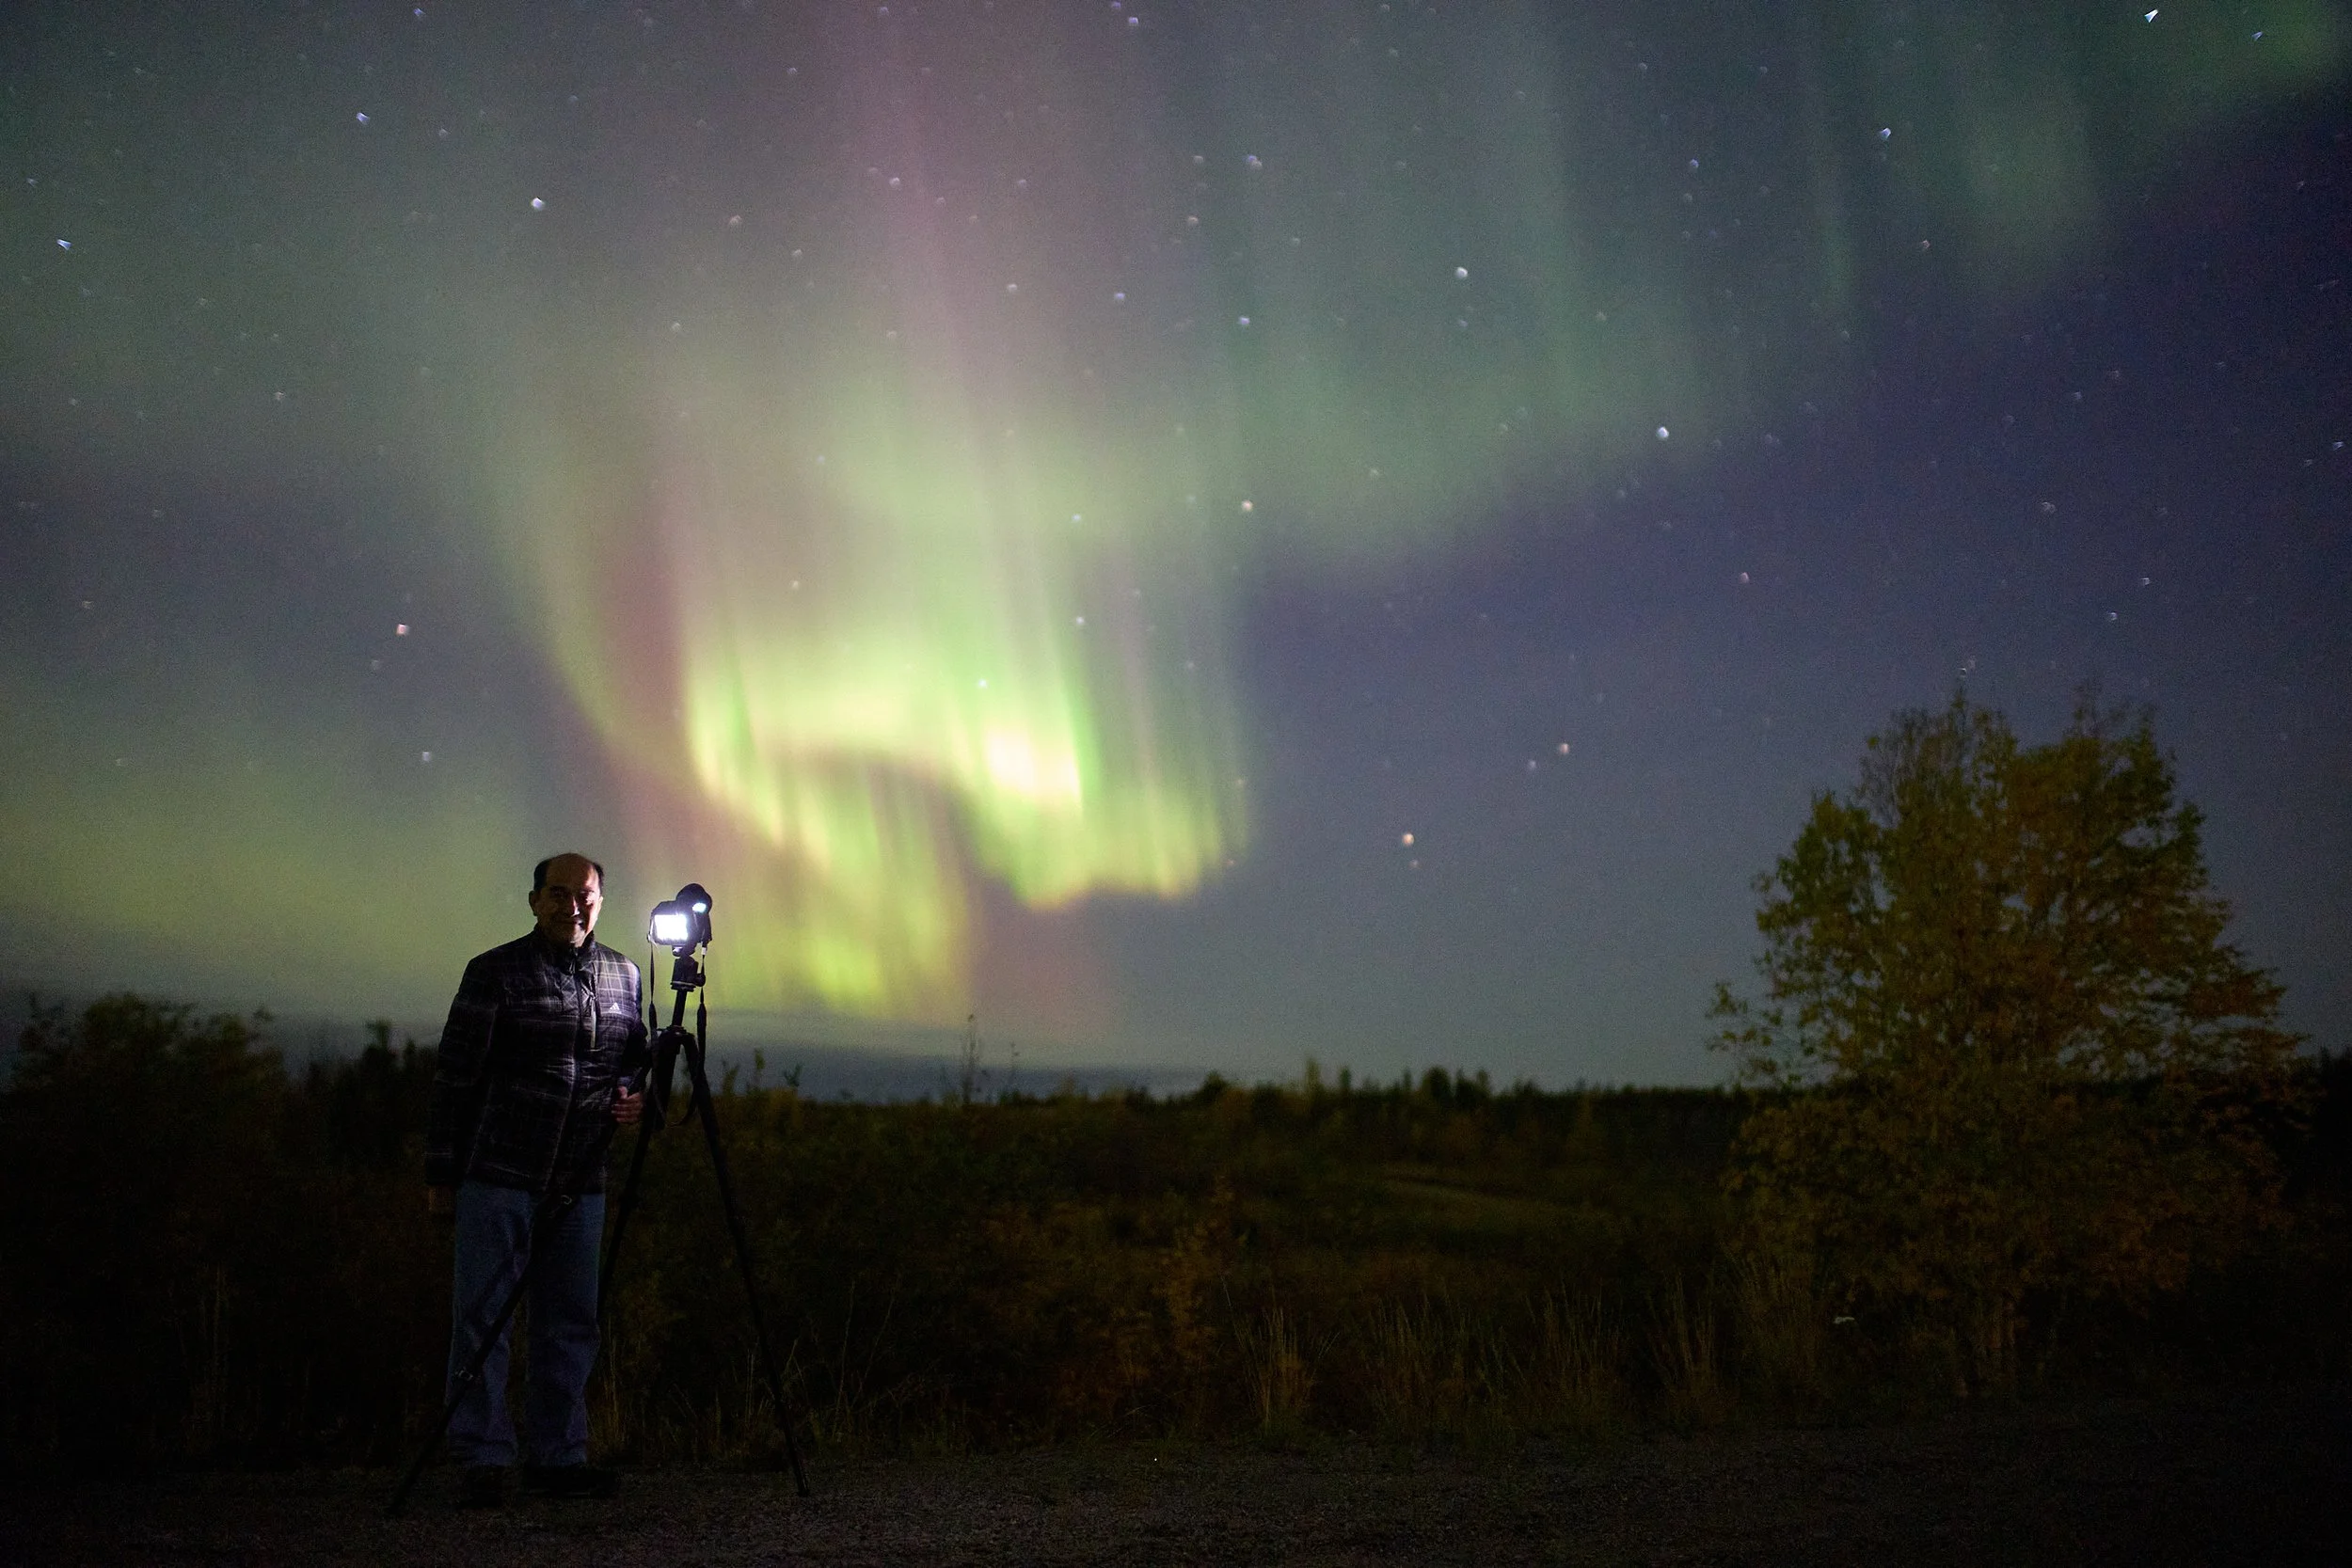
Aurora photography
Challenging the minimalist packer in us all to reveal one of the most beautiful worlds you’ll ever see.
Whether you’re travelling with your familiar and well loved DSLR camera, a newer inter-changeable lens mirrorless camera, or just your cell phone, the possibilities and beauty that await you on the other side of your camera lens are almost endless.
Photographing with your cell phone
If you are at all interested in taking photos of the aurora with your cell phone camera, I cannot stress enough that you experiment with your camera before you arrive. Please read over this small guide below, and take the time one evening in your candle lit living room or while you’re laying in your bed with your lights off to play with the settings below and become familiar with the buttons mentioned.
I will always be there for you on tour, but in the winter especially, I have to protect my fingers from the cold which means I can’t adjust your settings for you.
iPhone
Apple’s release of iOS 26 included a redesign of the Camera app which has changed how you interact with Night mode.
iOS 18
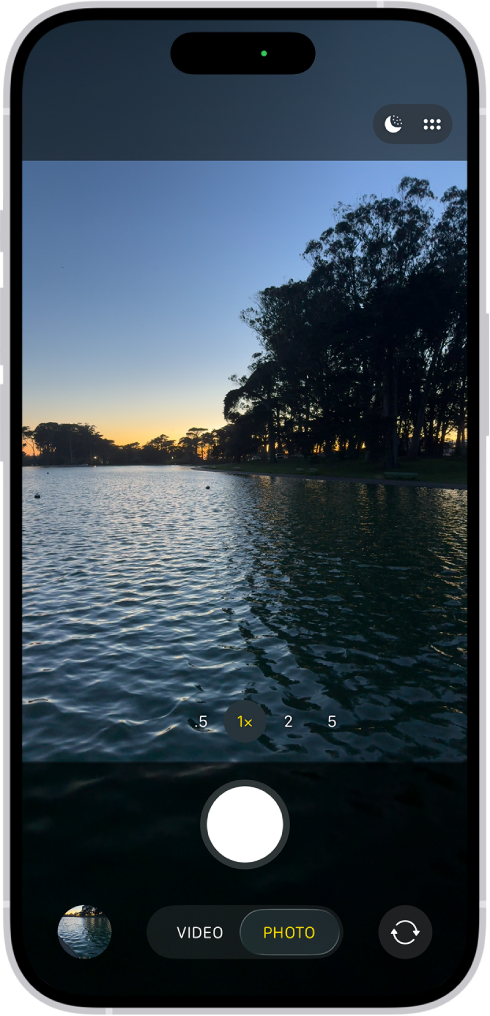
1) Open the Camera app on your iPhone, and ensure Night mode is On

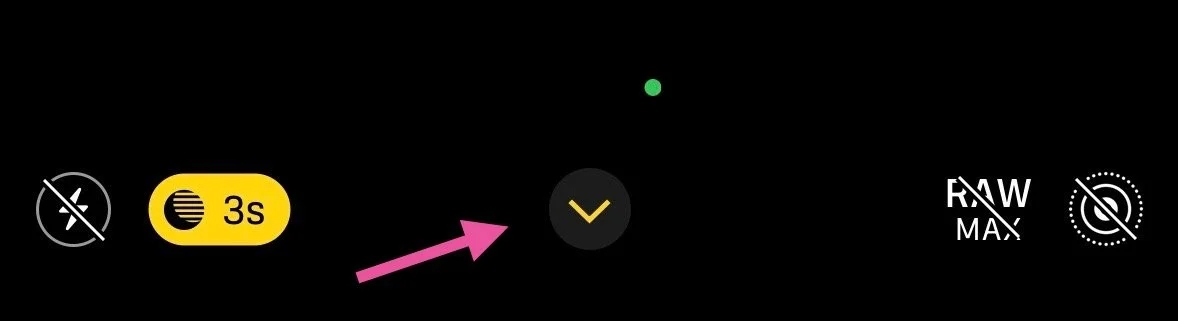
2) Tap the arrow at the top of the screen
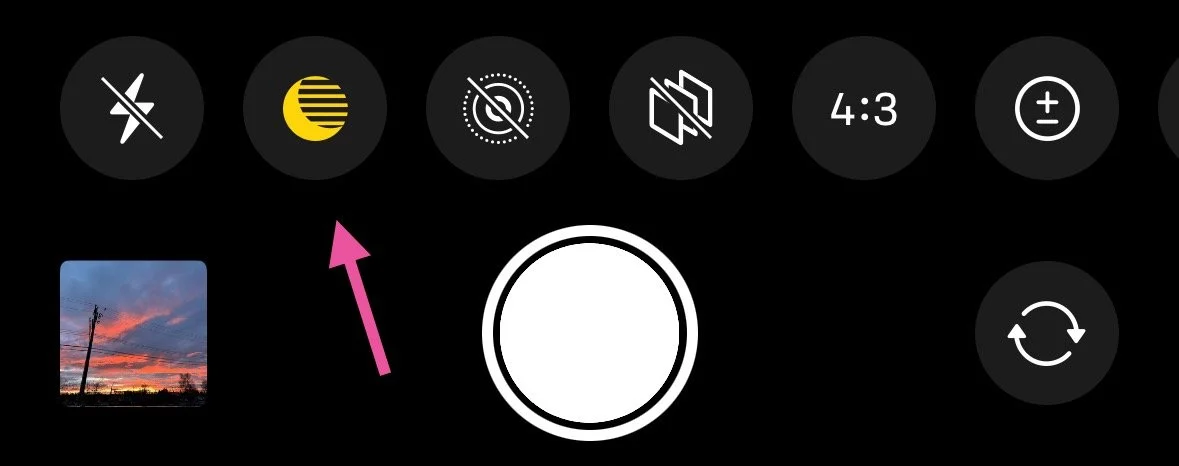
3) Tap the Night mode icon in the row options at the bottom of the screen
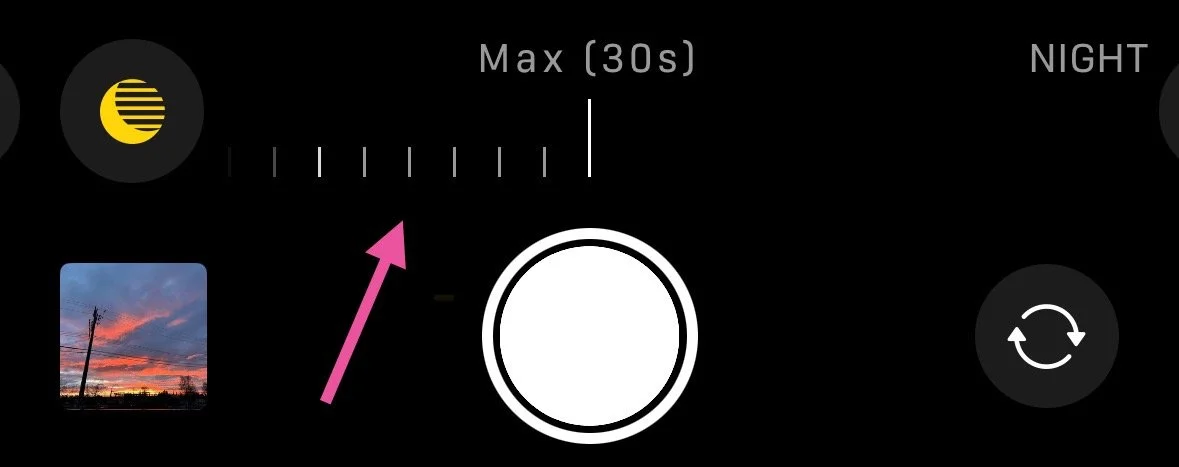
4) Drag the slider left or right to choose either the Auto or Max timers. Max will give you the longest exposure time available - either 5 or 10 seconds if the phone is hand held, or 30 seconds if it’s completely still.
Press the shutter button to take the photo.
If you are hand holding, crosshairs will appear in the frame if your iPhone detects movement. Align the crosshairs as best you can.
1) Open the Camera app on your iPhone, and ensure Night mode is On (a crescent moon icon in the top right corner)
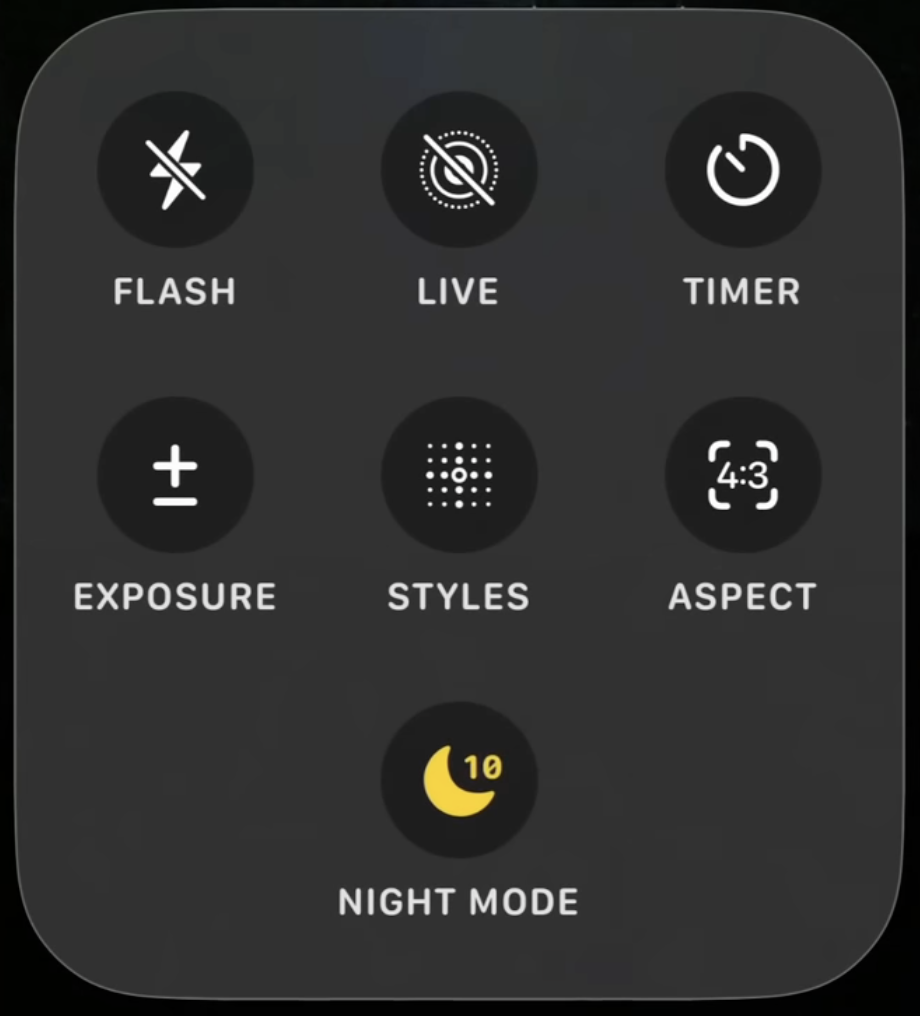
iOS 26
2) Tap the 6 dots in the top right corner
3) Tap the Night mode icon to cycle through the Auto and Max timers.
Max will give you the longest exposure time available - either 5 or 10 seconds if the phone is hand held, or 30 seconds if it’s completely still.
Tap outside of the pop-up box to return to the camera, and press the shutter button to take the photo.
If you are hand holding, crosshairs will appear in the frame if your iPhone detects movement. Align the crosshairs as best you can.
Samsung
Samsung smartphones have Night mode which is very similar to the iPhone’s Night mode.
Pro mode allows for full manual control of your camera and will achieve better photos, but you will need a basic understanding of photography to fully take advantage of Pro mode.
1) Open the Camera app, swipe to More, and select Night.
Night mode
2) Take the photo, and hold the phone as still as possible.
Pro mode
1) Open the camera app, swipe to More, and select Pro.
2) Along the bottom, you will see a variety of text including ISO, Speed, Focus, WB.
Depending on the moon phase and brightness of the aurora, your starting place for your ISO and shutter speed will vary a lot. A higher ISO (3200, 6400) may be necessary for moonless nights, and high ISOs will produce more grain in your photos. On nights with a full moon and a snowy landscape, it may be as low as 400 or 800.
A good general place to begin is ISO 1600, and your shutter speed around 10 seconds (10), not to be confused with 1/10 (one tenth of one second).
As the aurora increases in brightness and the speed with which it moves, you may need to reduce your shutter speed, ISO, or both. A shorter shutter speed will capture the shape of a fast moving auroral structure better, however, this may still require a higher ISO.
Photographing in Pro mode usually requires a more hands on experience where you need to make adjustments to your settings based on the brightness of the aurora in the sky.
Samsung provides a tutorial on their Pro mode here.

Any camera that gives you the ability to control, at least a little bit, your aperture, your shutter speed and your ISO already gives you a great chance here. It is essential that you explore manual mode on your camera before you arrive to ensure you can not only individually adjust each of these settings, but become familiar with how to change your ISO, aperture, shutter speed, and focus from auto focus to manual focus.
You are very generally going to want to aim to be able to set your ISO to between 800 and 3200, shutter speed up to 15 seconds (15"), and your aperture to the lowest number you can. f3.5 is fine, f2.8 is great, and anything lower than that is excellent.
Cameras made of metal will become much colder than ones made from composite or plastic. As your camera gets colder through the night, you may notice it begin to lag when you change settings and view your images, or the back screen may stop working altogether - all of this temporarily, of course. This is relatively normal.
More technically speaking

When we are out in the countryside, with no real lights in the distance, and no moon, your auto focus will become useless (because there is nothing of significant contrast for it to lock on to). This means you're going to need to know how to manually focus your lens to infinity (so the stars and aurora are in focus and sharp. This is going to be near that little infinity loop - ∞ - marking on your lens, but not always necessarily right in the middle of it. The sweet spot will vary lens to lens, and change slightly with the temperature too.
There are a few things you can do to help you achieve focus more easily. From your accommodation in Yellowknife, use your auto focus to lock onto some city lights (or landscape if it is still bright out) as far from you as possible, switch your lens/camera back to MF - manual focus - and note where your lens distance scale markings are aligned, or even better, tape your focus ring to the barrel of the lens so you cannot accidentally move the focus ring from that set position.
Once you begin taking photos of the night sky, you can review them in camera and make small adjustments to the focus as you need. You may also be able to use your camera's live view function to visually adjust your focus until you can see that the stars showing on your LCD screen are sharp (pin points of light).
Focus

Life as a gear mule
Outside of your usual, everyday photography items you would travel with, like additional memory cards, cleaning cloths and your battery charger, there’s a few additional things that will help you up here.
Tripod
It doesn't need to be fancy, but you will need one to achieve clear, sharp images because of the longer exposure times. If you have the choice, choose one that stands at an appropriate height for you, and if you can avoid extending the centre column, that will help achieve greater stability.

Shutter release cable
Not necessary, but the benefit to having a cable release is a reduced risk of a slightly blurry image from pushing the shutter button and shaking the camera doing so, especially with bulky gloves on. The 2 second timer on your camera is a good alternative.

Extra batteries
The cold will not be so friendly to your batteries up here, so I suggest you always have extras - or bring a charging cable with you on tour for your phone. There are, limited, USB-A ports in my vehicle.
Batteries on the whole will benefit from being warm. If you can store your spare batteries in an inside pocket next to your body, they will keep better for when you need to switch them out. Often when a battery dies in the cold, it likely wasn't because it was drained to 0% - just very cold. If you can get them warmed back up, either inside the car or next to your body, you’ll be able to get more use from them later.

Headlamp with red light
If you feel that you'll need a light to make adjustments to your camera or tripod while we are out, it's really important that your light or headlamp has a night vision mode - a red light. This is essential to preserve our night vision and minimally impact our other guests sharing this experience. White light is very harsh on our eyes once we have achieved night vision, and of course the brightness, especially carelessly aimed, can ruin photos as well.
Cleaning cloth or lens warmer
While Yellowknife is a very dry climate, we do experience periods of higher humidity, especially in the fall. Condensation will form on your lens and camera, and you’ll want to clean your lens with just a simple lens/glasses microfiber cloth.
Condensation in the winter is more rare, but some nights you may see ice crystals form on your lens still.
B&H sells professional lens warmers, but alternatively you can try something more casual like a hand warmer attached to your lens with a rubber band etc.

Ziplock bag or camera bag
When you bring something that has been at -30°C for a few hours, into an environment 50°C warmer, condensation can develop. Personally I have not taken great care about this and my equipment has been fine, but the construction of cameras vary greatly and you should do whatever will make you feel safest. You can minimize the condensation issue by placing your camera in a loosely closed bag when you bring it inside for the night. It will help the camera warm up more gradually.
Closing thoughts
Before you arrive in Yellowknife and try to figure out how to change your camera's manual settings and adjust your tripod at -25°C in the dark, please practice at home.
Just as important as changing your shutter speed is knowing how to operate your tripod head so you can shift your camera's view effortlessly.
Remove any filters (including UV) from your lens when shooting at night to avoid Newton’s rings.